
Introduction
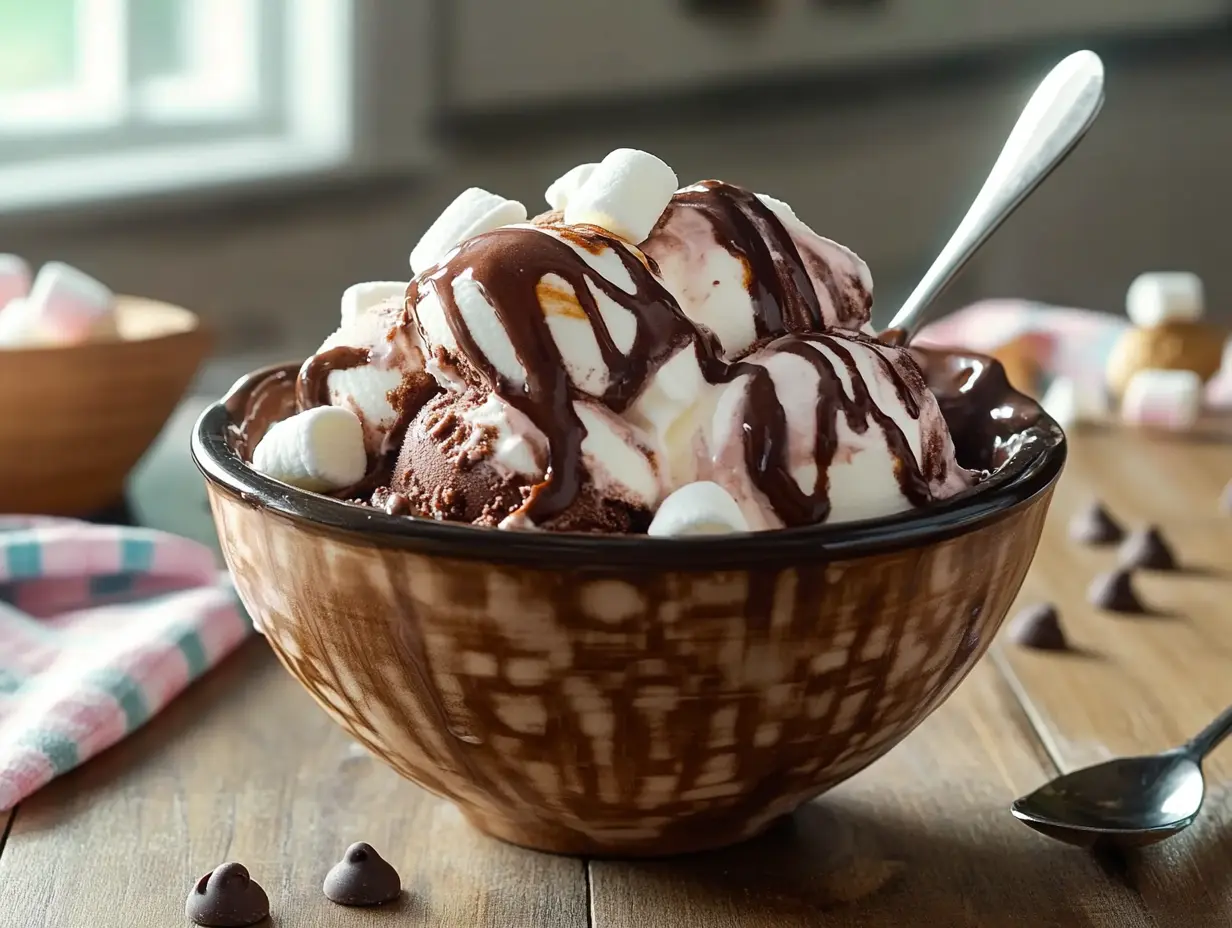
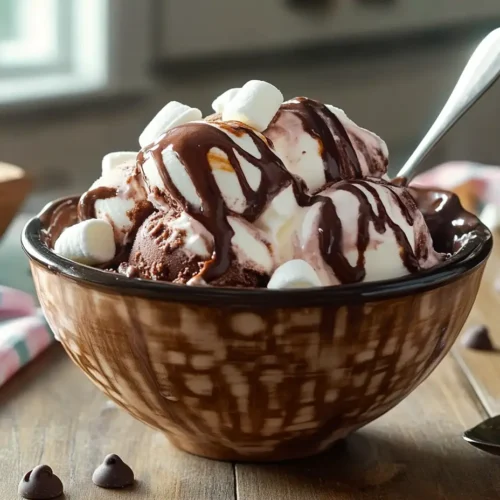
If you love rich chocolate and gooey marshmallows, this Chocolate Marshmallow Ice Cream is going to be your new favorite dessert! Made with a creamy chocolate base and swirls of soft, pillowy marshmallows, this ice cream is a perfect homemade treat for any occasion.
This recipe is easy to make, requires simple ingredients, and delivers a smooth, decadent texture without the need for an ice cream maker. Whether you’re enjoying it on a hot summer day or using it to make the ultimate ice cream sandwiches, this dessert is sure to impress.
Why You’ll Love This Recipe
✅ Ultra Creamy & Chocolatey – A smooth, rich cocoa base with melt-in-your-mouth marshmallows.
✅ No Ice Cream Maker Needed – Easily made with a simple no-churn method.
✅ Customizable – Add chocolate chips, caramel swirls, or nuts for extra indulgence.
✅ Perfect for Kids & Adults – A fun treat that everyone will enjoy!
Recipe Snapshot
- ⏱ Prep Time: 15 minutes
- ❄ Chill Time: 4-6 hours
- 🍽️ Servings: 6-8
💡 Looking for the perfect cookie to pair with this ice cream? Try our Wafer Cookies for a delicious crunchy contrast!
Table of Contents – Find Exactly What You’re Looking For!
Why You’ll Love This Chocolate Marshmallow Ice Cream
This homemade Chocolate Marshmallow Ice Cream is an irresistible blend of rich cocoa and fluffy marshmallow swirls, making it a creamy, indulgent, and nostalgic dessert. Here’s why you’ll love it:
✅ 1. Rich & Creamy Texture
The combination of heavy cream and sweetened condensed milk creates an ultra-smooth, scoopable ice cream that’s just as good as store-bought—without any preservatives!
✅ 2. Gooey Marshmallow Swirls
The marshmallow ribbons melt into the chocolate base, creating pockets of sweet, fluffy goodness in every bite.
✅ 3. No Ice Cream Maker Needed
This no-churn recipe makes it super easy to create homemade ice cream—just mix, freeze, and enjoy!
✅ 4. Perfect for Toppings & Mix-ins
Want to make it even better? Try adding:
- Chocolate chips for an extra crunch
- Crushed cookies for texture
- Caramel or fudge swirls for extra indulgence
✅ 5. A Family Favorite
Kids and adults love this classic flavor combination, making it a great treat for birthday parties, summer gatherings, or just a fun homemade dessert.
💡 Love frozen treats? Try our Cookie Monster Ice Cream for another fun and delicious flavor!
Ingredients You’ll Need for Chocolate Marshmallow Ice Cream
Making homemade chocolate marshmallow ice cream requires just a few simple ingredients, but the result is rich, creamy, and packed with flavor.
✅ 1. Ice Cream Base
- 2 cups heavy cream – Creates a rich and creamy texture.
- 1 can (14 oz) sweetened condensed milk – Adds sweetness and smoothness.
- ½ cup whole milk – Helps balance the consistency.
- ¼ cup unsweetened cocoa powder – Gives a deep chocolate flavor.
- 1 teaspoon vanilla extract – Enhances the sweetness of the chocolate.
- ¼ teaspoon salt – Balances the flavors.
✅ 2. Marshmallow Swirl
- 1 cup marshmallow fluff (or melted mini marshmallows) – Creates gooey ribbons of marshmallow throughout the ice cream.
- 1 tablespoon milk – Helps loosen the marshmallow for easy swirling.
✅ 3. Optional Add-ins (For extra flavor and texture!)
- ½ cup chocolate chips or chunks – Adds a satisfying crunch.
- ¼ cup crushed graham crackers – Turns it into a “s’mores” ice cream.
- ¼ cup caramel or fudge sauce – For a decadent twist.
💡 Want to make this even more indulgent? Serve it with our Chocolate Lava Cake for the ultimate dessert pairing!
How to Make Chocolate Marshmallow Ice Cream (Step-by-Step Instructions)
This no-churn chocolate marshmallow ice cream is incredibly easy to make and requires no ice cream maker! Just mix, swirl, and freeze for a rich, creamy, and indulgent dessert.
✅ Step 1: Prepare the Chocolate Ice Cream Base
1️⃣ In a large mixing bowl, whisk together:
- Sweetened condensed milk
- Whole milk
- Unsweetened cocoa powder
- Vanilla extract
- Salt
2️⃣ In a separate bowl, use a hand mixer or stand mixer to whip the heavy cream on medium-high speed until stiff peaks form (about 3-4 minutes).
3️⃣ Gently fold the whipped cream into the chocolate mixture using a spatula until smooth and fully combined.
💡 Pro Tip: Be careful not to overmix—the goal is to keep the mixture light and airy for a fluffy texture!

✅ Step 2: Prepare the Marshmallow Swirl
4️⃣ In a small microwave-safe bowl, combine:
- Marshmallow fluff
- 1 tablespoon milk
5️⃣ Microwave for 10-15 seconds, then stir until smooth.
💡 If using mini marshmallows instead of fluff, microwave them with the milk until melted, then stir into a smooth sauce.
✅ Step 3: Assemble the Ice Cream
6️⃣ Pour half of the chocolate ice cream base into a freezer-safe container.
7️⃣ Drizzle half of the marshmallow mixture over the top.
8️⃣ Use a knife or skewer to gently swirl the marshmallow into the chocolate.
9️⃣ Repeat with the remaining chocolate ice cream and marshmallow swirl.
🔟 Sprinkle any optional mix-ins (like chocolate chips or graham crackers) on top.
💡 For a stronger s’mores flavor, layer in crushed graham crackers between each swirl!

✅ Step 4: Freeze & Serve
1️⃣1️⃣ Cover the container with plastic wrap or a lid to prevent ice crystals from forming.
1️⃣2️⃣ Freeze for at least 4-6 hours, or until firm.
1️⃣3️⃣ When ready to serve, let the ice cream sit at room temperature for 5 minutes before scooping.
💡 Want a fun way to serve it? Scoop it between two Wafer Cookies for an easy homemade ice cream sandwich!

Expert Tips & Tricks for the Best Chocolate Marshmallow Ice Cream
Want to make the creamiest, most flavorful homemade chocolate marshmallow ice cream? Follow these expert tips to ensure perfect texture and taste every time!
✅ 1. Use High-Quality Cocoa Powder
For the richest chocolate flavor, use Dutch-processed cocoa powder instead of regular cocoa. It gives the ice cream a deep, intense chocolate taste with a smoother finish.
✅ 2. Whip the Cream to Stiff Peaks
- Be sure to whip the heavy cream until stiff peaks form before folding it into the chocolate base.
- This step creates an airy, light texture, preventing the ice cream from becoming dense or icy.
✅ 3. Gently Fold, Don’t Overmix
When combining the whipped cream with the chocolate mixture, use a gentle folding motion with a spatula. Overmixing can cause the ice cream to lose its airy consistency, making it too firm.
✅ 4. Swirl the Marshmallow for the Best Texture
- Don’t overmix the marshmallow swirl into the chocolate base—you want visible, gooey ribbons throughout the ice cream.
- Use a knife or skewer to gently create a marbled effect.
✅ 5. Add Mix-Ins for Extra Crunch & Flavor
Customize your ice cream by adding:
- Mini chocolate chips or chocolate chunks for an extra crunch.
- Crushed graham crackers to create a s’mores-inspired treat.
- A drizzle of caramel or hot fudge for an extra layer of indulgence.
✅ 6. Let It Soften Before Scooping
For the best texture, let the ice cream sit at room temperature for 5 minutes before serving. This makes it easier to scoop and enhances the creamy consistency.
💡 Want another easy frozen treat? Try our Cookie Monster Ice Cream for a fun and colorful dessert!
Serving Suggestions & Pairings for Chocolate Marshmallow Ice Cream
This Chocolate Marshmallow Ice Cream is already delicious on its own, but pairing it with the right treats takes it to the next level! Whether you enjoy it in a cone, a sundae, or as part of a decadent dessert, here are some of the best ways to serve it.
✅ 1. Classic Ways to Serve It
- In a Waffle Cone – The crispy texture of a classic waffle cone complements the creamy ice cream perfectly.
- In a Bowl with Extra Toppings – Add a drizzle of hot fudge, caramel, or peanut butter sauce for extra indulgence.
- As an Ice Cream Sandwich – Scoop it between two Wafer Cookies for a delicious frozen treat!
✅ 2. Make a Decadent Ice Cream Sundae
Turn this ice cream into a sundae masterpiece with these toppings:
- Whipped cream – Light and fluffy, it balances the richness of the chocolate.
- Crushed graham crackers – Adds a subtle crunch and a s’mores vibe.
- Toasted marshmallows – Brings out the gooey marshmallow flavor in the ice cream.
- Chopped nuts – Almonds or pecans add a slight crunch.
✅ 3. Pair It with Warm Desserts
Enjoy the contrast of cold, creamy ice cream with warm, freshly baked treats!
- Chocolate Lava Cake – The warm, molten chocolate center pairs perfectly with the cold ice cream.
- Brownies – Serve a scoop over a fudgy brownie for the ultimate indulgence.
- Freshly Baked Cookies – Classic chocolate chip cookies or peanut butter cookies make a great pairing.
✅ 4. Use It to Make a Milkshake
Blend a scoop or two with milk and a drizzle of chocolate syrup for an extra creamy chocolate marshmallow milkshake!
💡 Want to try another homemade frozen dessert? Check out our Cookie Monster Ice Cream for a fun and colorful twist!
Storage & Freezing Tips for Chocolate Marshmallow Ice Cream
To keep your homemade chocolate marshmallow ice cream creamy and fresh, follow these storage and freezing tips. Proper storage prevents ice crystals from forming and ensures smooth, scoopable ice cream every time!
✅ 1. How to Store Chocolate Marshmallow Ice Cream
Best Container:
- Use a shallow, airtight container to help the ice cream freeze evenly.
- A metal loaf pan works great for freezing and easy scooping.
Sealing the Ice Cream:
- Press a piece of plastic wrap or parchment paper directly onto the surface before closing the lid. This prevents ice crystals from forming.
Freezer Temperature:
- Keep your freezer set at 0°F (-18°C) or lower for the best texture.
- Store ice cream away from the freezer door to avoid temperature fluctuations.
✅ 2. How Long Does It Last?
- Best Quality: Enjoy within 2-3 weeks for the creamiest texture.
- Max Storage Time: Can be stored for up to 2 months, but ice crystals may develop over time.
✅ 3. How to Keep It Soft & Scoopable
- Let the ice cream sit at room temperature for 5 minutes before scooping.
- Use an ice cream scoop dipped in warm water to glide through the ice cream easily.
✅ 4. Avoiding Freezer Burn
- Always keep the container sealed tightly to prevent air exposure.
- If possible, store in smaller portions to limit how much air gets into the container when opening and closing it.
💡 Want another homemade dessert to enjoy with your ice cream? Try our Wafer Cookies for a crunchy and delicious pairing!
Nutritional Information for Chocolate Marshmallow Ice Cream
This homemade chocolate marshmallow ice cream is a decadent and creamy treat, perfect for satisfying your sweet tooth. Below is an estimated nutritional breakdown per serving.
✅ 1. Estimated Nutrition Per Serving (Based on a ½-cup serving size)
| Nutrient | Amount Per Serving |
|---|---|
| Calories | ~280 kcal |
| Total Fat | ~18g |
| Saturated Fat | ~11g |
| Cholesterol | ~50mg |
| Carbohydrates | ~30g |
| Sugar | ~25g |
| Protein | ~4g |
| Sodium | ~80mg |
✅ 2. Key Health Benefits (in Moderation!)
- Rich in Calcium – Due to the heavy cream and milk.
- Source of Energy – The sugars provide a quick energy boost.
- Mood-Boosting – Chocolate contains natural compounds that help increase happiness and relaxation!
✅ 3. How to Make It Healthier
Want to enjoy this ice cream with less sugar or fewer calories? Try these swaps:
- Use unsweetened cocoa powder instead of regular chocolate syrup for less sugar.
- Replace sweetened condensed milk with a low-sugar or dairy-free alternative.
- Use a sugar substitute like monk fruit or stevia for a lower-carb version.
- Swap in coconut cream for a dairy-free, plant-based alternative.
💡 Looking for another sweet treat? Try our Chocolate Lava Cake for the ultimate chocolate lover’s dessert!
Frequently Asked Questions (FAQs) About Chocolate Marshmallow Ice Cream
Here are some common questions about making the best homemade chocolate marshmallow ice cream at home.
✅ 1. Can I make this ice cream without an electric mixer?
Yes! While a hand mixer makes whipping the cream easier, you can whisk the heavy cream by hand—it just takes longer. Use a chilled bowl and whisk vigorously until stiff peaks form.
✅ 2. How do I prevent ice crystals in homemade ice cream?
- Always press plastic wrap directly onto the surface of the ice cream before freezing.
- Store it in an airtight, freezer-safe container.
- Keep it in the back of the freezer to avoid temperature fluctuations.
✅ 3. Can I use mini marshmallows instead of marshmallow fluff?
Yes! Simply melt mini marshmallows with a little milk in the microwave, then swirl them into the ice cream mixture. This will create the same gooey texture as marshmallow fluff.
✅ 4. Can I make this recipe dairy-free?
Absolutely! Replace:
- Heavy cream with full-fat coconut cream
- Sweetened condensed milk with sweetened condensed coconut milk
- Whole milk with almond or oat milk
✅ 5. How long does homemade no-churn ice cream take to freeze?
For the best texture, freeze for at least 4-6 hours. If you prefer a firmer consistency, let it freeze overnight.
✅ 6. What are some fun mix-ins for this ice cream?
- Chocolate chips or chunks for extra crunch
- Graham cracker pieces for a s’mores-inspired treat
- Swirls of peanut butter or caramel for extra indulgence
💡 Want another fun frozen dessert? Try our Cookie Monster Ice Cream for a colorful and delicious treat!
Conclusion + More Delicious Recipes to Try
Chocolate Marshmallow Ice Cream is the perfect creamy, chocolatey, and gooey dessert that’s easy to make at home! Whether you’re scooping it into a cone, layering it in a sundae, or using it for homemade ice cream sandwiches, this no-churn recipe is sure to become a favorite for kids and adults alike.

✅ More Delicious Recipes to Try
If you loved this Chocolate Marshmallow Ice Cream, here are more sweet and frozen treats to enjoy:
- Cookie Monster Ice Cream – A fun and colorful ice cream for all ages
- Chocolate Lava Cake – The perfect warm dessert to pair with your ice cream
- Wafer Cookies – Crispy cookies that make the best ice cream sandwiches
✅ Join the Conversation!
I’d love to hear how your Chocolate Marshmallow Ice Cream turned out! Leave a comment below and let me know:
- Did you try any fun mix-ins like chocolate chips, caramel, or graham crackers?
- What’s your favorite way to serve this ice cream?
- Would you like to see more no-churn ice cream recipes?
✅ Share & Stay Connected
📌 Save this recipe on Pinterest!
📢 Follow me on social media for more homemade dessert ideas:
- Instagram: @CathyRecipes
- Facebook: Cathy’s Facebook Profile
- Pinterest: Cathy’s Pinterest
✅ Don’t forget to rate this recipe if you enjoyed it! Your feedback helps others find and try this delicious treat.
Print Recipe
Chocolate Marshmallow Ice Cream: A Creamy & Indulgent Treat
Equipment
- Mixing bowls for combining ingredients
- Hand mixer or stand mixer for whipping the cream
- Rubber spatula for folding ingredients together
- Microwave-safe bowl for melting marshmallows if needed
- Loaf pan or freezer-safe container for storing the ice cream
Ingredients
For the Chocolate Ice Cream Base:
- 2 cups heavy cream for a rich, creamy texture
- 1 can 14 oz sweetened condensed milk (adds sweetness and smoothness)
- ½ cup whole milk helps balance the consistency
- ¼ cup unsweetened cocoa powder for deep chocolate flavor
- 1 teaspoon vanilla extract enhances the chocolate flavor
- ¼ teaspoon salt balances the sweetness
For the Marshmallow Swirl:
- 1 cup marshmallow fluff for gooey swirls in the ice cream
- 1 tablespoon milk helps loosen the marshmallow for easy swirling
Optional Mix-ins: (Choose your favorites!)
- ½ cup chocolate chips or chunks adds extra crunch
- ¼ cup crushed graham crackers for a s’mores-inspired flavor
- ¼ cup caramel or fudge sauce for extra decadence
Instructions
Step 1: Prepare the Chocolate Ice Cream Base
- 1️⃣ In a large mixing bowl, whisk together:
- Sweetened condensed milk
- Whole milk
- Unsweetened cocoa powder
- Vanilla extract
- Salt
- 2️⃣ In a separate bowl, use a hand mixer or stand mixer to whip the heavy cream on medium-high speed until stiff peaks form (about 3-4 minutes).
- 3️⃣ Gently fold the whipped cream into the chocolate mixture using a rubber spatula until fully combined.
💡 Pro Tip: Be careful not to overmix—the goal is to keep the mixture light and airy for a fluffy texture!
Step 2: Prepare the Marshmallow Swirl
- 4️⃣ In a small microwave-safe bowl, combine:
- Marshmallow fluff
- 1 tablespoon milk
- 5️⃣ Microwave for 10-15 seconds, then stir until smooth.
💡 If using mini marshmallows instead of fluff, microwave them with the milk until melted, then stir into a smooth sauce.
Step 3: Assemble the Ice Cream
- 6️⃣ Pour half of the chocolate ice cream base into a freezer-safe container.
- 7️⃣ Drizzle half of the marshmallow mixture over the top.
- 8️⃣ Use a knife or skewer to gently swirl the marshmallow into the chocolate.
- 9️⃣ Repeat with the remaining chocolate ice cream and marshmallow swirl.
- 🔟 Sprinkle any optional mix-ins (like chocolate chips or graham crackers) on top.
💡 For a stronger s’mores flavor, layer in crushed graham crackers between each swirl!
Step 4: Freeze & Serve
- 1️⃣1️⃣ Cover the container with plastic wrap or a lid to prevent ice crystals from forming.
- 1️⃣2️⃣ Freeze for at least 4-6 hours, or until firm.
- 1️⃣3️⃣ When ready to serve, let the ice cream sit at room temperature for 5 minutes before scooping.
💡 Want a fun way to serve it? Scoop it between two Wafer Cookies for an easy homemade ice cream sandwich!
Notes
- Store in an airtight, freezer-safe container for up to 2 months.
- Press a layer of plastic wrap directly onto the ice cream surface before sealing the lid to prevent ice crystals.
- Let the ice cream sit at room temperature for 5 minutes before scooping for the best texture.
- Warm your ice cream scoop under hot water before scooping for easier serving.
- S’mores Ice Cream: Add crushed graham crackers and chocolate chunks.
- Rocky Road Style: Add mini marshmallows, almonds, and fudge swirls.
- Double Chocolate: Mix in extra dark chocolate chips for a richer flavor.